Download Cloud1Vpn Desktop Client Installer
Watch The Video Tutorials

Installing Cloud1Vpn Desktop Client for Windows

Importing Cloud1Vpn Servers Configurations
Conntecting To Your Dedicated Cloud1Vpn Server

Accessing Your CloudVault Files From Your Windows

Testing Network Speed With Cloud1Vpn Client
Installing Cloud1Vpn Windows Client
- Download the Microsoft installer from the download section above.
- When the download is completed, open The Downloads folder and double click the imstaller to start the Setup
- Complete the installation by following the instructions in the setup wizard
- The installation steps are generally simple and only require clicking on `Accept` and `Next` buttons
- You may be prompted to grant the instller permission to install network drivers and other VPN components
Launching Cloud1Vpn Windows Client
- Start Cloud1Vpn from the Applications Menu or your Program Files Folder
- The red (disconnected) Cloud1Vpn icon will be added to the system menu bar at the top of the screen.
- Note:
- Certain versions of Windows do not support System Tray Icon. A Floating Icon may be used as a replacement
- Depending on the version of Windows installed on your system, Cloud1Vpn Contextual Menu may be accessed using your mouse right click or left click
IMPORTING CLOUD1VPN SERVERS Configs
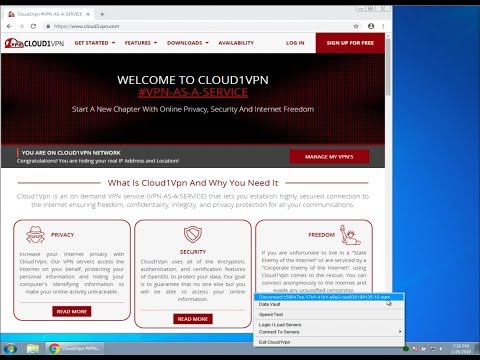
- From the menu bar, click the Cloud1Vpn Systray icon to access the dropdown menu
- Click on Login / Load Server from the menu
- Authenticate using your Cloud1Vpn phone number and password
- Once You're logged in , your servers configuration will auto import; a list of servers will be added under the menu Connect To Servers
- The servers' settings are cached for future use, so you won't need to authenticate everytime
Conntecting To Your Dedicated Server
- From the menu bar, click the Cloud1Vpn icon to access the dropdown menu
- Choose the server you would like to connect to from the Connect To Servers menu
- The system will validate your configuration and authenticate; Once logged in, the Cloud1Vpn Systray icon will switch to green
-
The systray icon is contstantly monitoring the connection using the following color indicators:
- Red: Not connected or VPN tunnel is down
- Orange: Logged in but not connected
- Green: Connected
TESTING NETWORK SPEED WITH CLOUD1VPN
- From the menu bar, click the Cloud1Vpn Systray icon to access the dropdown menu
- Click on Speed Test from the menu
- From the Speed Test window Click the Go button
- The test will take a few moments to analyze your connection
- The test will analyze your Ping time
- The test will analyze your Jitter time
- The test will analyze your Download speed
- The test will analyze your Upload speed
- You can click the Again button to re run the test
Accessing Your CloudVault Files
Cloud1Vpn DataVault mounts with Windows native filesystem transparently; you do not need to install any additional software or configuration. Even though your files are stored on your dedicated remote server, you are able to manage and edit them as if they were present inside a local directory on your Computer. Your remote files can be accessed from File Explorer but are always stored securily inside your VPN and only accessible when you're connected to your VPN.
- From the menu bar, click the Cloud1Vpn Systray icon to access the dropdown menu.
- If you have Vault Feature enabled, the Data Vault menu
-
A Finder window will open listing the content of your files
- Please note that:
- You can only access your Data Vault if you are connected to Cloud1Vpn
- Your Data Vault files are not copied to your local Computer unless you copy then manually
Download OpenVpn Client Installer
Install OpenVpn Client
- Select and download the version that is compatible with your operating system.
- When download is completed, Open The downloaded folder and double click the downloaded file to start the installation
- Complete the installation by following the instructions in the setup wizard
- The installation steps are generally simple and only require clicking on `Accept` and `Next` buttons
- On certain versions of Windows, you may be propted to confirm an additioal Driver installation; If you see such a warning message, just click Accept/Next buttons; The driver will add a virtual network device to your operating system that will be used by OpenVpn Client
- On certain versions of Windows, you may need to have admin permission for this step to complete
Download Cloud1Vpn Config
- Go to My Dedicated Servers section (you may need to log in)
- Select the server you would like to use and click `Connect`
- On certain versions of Windows, this may launch the OpenVpn Client and auto connect without any additional steps.
- Otherwhise, start the download and save the `.opvn` configuration file
Import Cloud1Vpn Config
- Go to the downloaded `.opvpn` file and double click the file.
- In most Windows versions, this will launch OpenVpn Client and auto connect without the need for any additional steps.
- Otherwhise copy the downloaded `.opvn` file to your OpenVpn config folder ( You will generally find this under `C:\Program Files\OpenVpn\config` )
Connect to Cloud1Vpn Using OpenVpn
-
Launch OpenVpn Client, The OpenVpn Notification Icon should appear
- You can start OpenVpn Client from the Desktop shortcut
- You can also start OpenVpn Client from the Windows Start Menu
- You can also start OpenVpn Client from the Installtion `Program Files` folder
- Right click on the notification icon and you should see the Cloud1Vpn Profile corresponding to the `.ovpn` imported config
- Select the profile from the mennu that appears and click `Connect`
- The system will take a few seconds to validate your configuration and authenticate.
Verify Your Secure Connection
-
Use service such as https://cloud1vpn.com/geo/myip.html to verify your Internet speed when connected with Cloud1Vpn
- This may use a lot of data from your bandwidth
- Go to https://www.cloud1vpn.com/geo/myip.html to verify your location and IP address